This post is mainly targeted at people who have used an X-Fi USB audio card
with their PCs on Windows or Linux. Many of us got a bad surprise when we
plugged it into our shiny new Macs and we couldn’t even control the volume of
the device through the system.
This particular problem is due to lack of dedicated drivers made by Creative.
It seems that they only make OS X drivers for cards specially targeted at Macs.
Luckily there is a way to work around this limitation using a piece of software called Soundflower. The procedure is very simple, just follow the four steps here:
- Download and install SoundFlower (this might require a restart)
- Set Soundflower (2ch) as your audio output device (hint: you can option (⌥)-click your volume control icon in the menu)
- Launch Soundflowerbed (it was installed along with Soundflower)
- In the 2 channel device output options select your USB card.
And it is done, you can happily use your volume control buttons once again.
")

Last update: 2013-06-29 for Qt Creator 2.7.1
Staring at long lines of code can get frustrating. Even more so if the said
lines have ugly eye-hurting colors. I have been using the beautiful MacVim
theme in Vim for some time now and it is quite awesome. However QtCreator,
which I use for OpenViBE development, lacks such a theme. This problem was
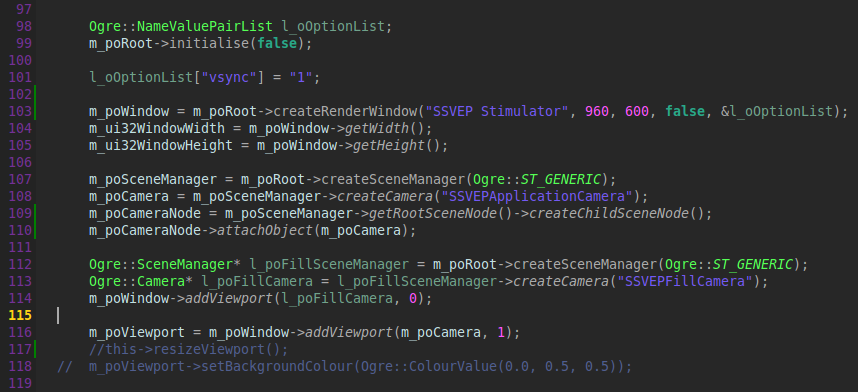
easily fixed though. Here is a screenshot of a theme I have created and,
because of the lack of creativity, named Gulf:
And here is the link for download:
Gulf QtCreator theme
Those ID3 tags on Cowon can be pesky. Sometimes you do not see the embedded
images, sometimes you see things like [11] instead of genres and if you are
really unlucky you will not see any tags at all. So, as a quick hint on how to
get all of this right:
- Use EasyTAG (can be downloaded using your package manager in most
distributions)
- In Settings → Preferences go to the ID3Tag settings and do the following
- Check Automatically convert old ID3v2 tag versions
- Check Write ID3v2 tag → Version 2.3
- Uncheck Write ID3v1.x tag
- Edit tags of your files, be sure to re-save all files which appear in red
in EasyTAG as they have probably different versions of ID3 tags

If you want to use images from the tags instead of the per-folder cover.jpg
files you can use EasyTAG to include them in the tags as well. Bear in mind
though that only jpeg files will be taken into account and only in mp3
files (no love for ogg users). Also for best effects use images of 272 x 272
pixels large.
I got bored to search for the url after uploading a file to the Dropbox’s
public folder. So I have hacked a quick shell script that takes the public url
of the latest file you uploaded to your public Dropbox folder and copies it to
the clipboard. I thought I could share:
#!/bin/sh
DROPBOX="$HOME/Dropbox" dropbox puburl "$DROPBOX/Public/\`ls -1 -t $DROPBOX/Public | head -n 1\`" | xclip
Now, on OS X I have a folder action which does the same thing automatically
when a new file is uploaded. I will have to tinker with inotify and get it to
work on Linux as well.
Much was written about connecting signal handlers to interfaces made with Glade
and imported with GtkBuilder. The problem is that everybody uses a different
system and/or language. So here is a guide which explains all the magic:
Glade Interface
First of all create your widget in Glade and assign it a signal handler. We are
going to create a very simple application which has a single button which exits
it. The Glade interface should look something like this. It is basically a Main
Window (main_window) widget with a Button (exit_button) inside. We define a
handler for the signal “clicked” for the button and call it
exit_button_handler.

C++ code
Now let’s create the source file, it looks like this. As you can see our signal
handler is just a basic void returning function.
#include <gtk/gtk.h>
extern "C" G_MODULE_EXPORT void exit_button_handler(GtkObject* caller, gpointer data)
{
gtk_main_quit();
}
int main(int argc, char ** argv)
{
gtk_init(&argc, &argv);
GtkBuilder* l_BuilderInterface = gtk_builder_new();
gtk_builder_add_from_file(l_BuilderInterface, "ui.glade", NULL);
gtk_builder_connect_signals(l_BuilderInterface, NULL);
gtk_widget_show(GTK_WIDGET(gtk_builder_get_object(l_BuilderInterface, "main_window")));
gtk_main();
return 0;
}
The important thing to notice is that the declaration of the callback function
is preceded by extern "C" G_MODULE_EXPORT. These two bits of code ensure that
the produced object will have a C-compatible table-entry for this function even
though we are using a C++ compiler and that it will be accessible under Windows
as well. Indeed, the G_MODULE_EXPORT macro expands to nothing under Linux.
Compilation
Now, we need to compile the whole thing. Let’s say we have called the file
above main.cpp. The line to call on Linux would be :
g++ `pkg-config --cflags --libs gtk+-2.0 gmodule-2.0` main.cpp -o test
Let’s look at the output of the pkg-config file for a while :
-pthread -I/usr/include/atk-1.0 -I/usr/include/pango-1.0 -I/usr/include/gio-unix-2.0/ -I/usr/include/glib-2.0 -I/usr/lib/x86_64-linux-gnu/glib-2.0/include -I/usr/include/freetype2 -I/usr/include/libpng12 -I/usr/include/gtk-2.0 -I/usr/lib/gtk-2.0/include -I/usr/include/cairo -I/usr/include/gdk-pixbuf-2.0 -I/usr/include/pixman-1 -pthread -Wl,--export-dynamic -L/usr/lib/x86_64-linux-gnu -lgtk-x11-2.0 -lgdk-x11-2.0 -latk-1.0 -lgio-2.0 -lpangoft2-1.0 -lpangocairo-1.0 -lgdk_pixbuf-2.0 -lm -lcairo -lpango-1.0 -lfreetype -lfontconfig -lgobject-2.0 -lgthread-2.0 -lgmodule-2.0 -lrt -lglib-2.0
That’s a lot of stuff! Depending on the system your mileage can vary,
but the important bit is : -Wl,--export-dynamic. This piece of code
ensures that you will be actually able to find the symbol once it is
needed. On Windows, there is no need for the –export-dynamic flag, just
be sure to load the gtk library as well as the gmodule. And that’s
it, done and done!
When I first got to use Mac OS X I have wondered whether it is possible to do
stuff which I was used to do (more or less) easily on Linux. Among others there
is the possibility to assign keyboard shortcuts to arbitrary actions (and
especially shell scripts). I found several tutorials on how to do this, but
they often include third party software like Quicksilver. Since I want to keep
my system as vanilla as possible I was searching for a way to do it otherwise,
and found it.
Introducing Services
Snow Leopard has this great thing called Services, which is a very simple to
use way of creating very powerful actions in no time. Now, usually these are
bound to a specific application or context, but they can be global. Since it is
much easier to explain something on an example, let us use a simple example.
Following this article on how to pause iTunes for a short period of time.
Step 1
- Open up the Automator.
- Create a New Service.
- In the ‘service receives selected’ drop-down box select no input in
any application.
- In the left sidebar find Run AppleScript and drag it into the workflow
- Paste the code below on the place where it says ( Your script goes here
)
- Save the service as “Pause iTunes for 5 minutes”
The script in question follows:
tell application "iTunes"
    pause
    delay 300
    play
end tell
In the end the whole Automator window should look like this.

If you go to the current application’s menu now you should see your service in
the Services sub-menu.
Step 2
Now the only thing that remains is to add a keyboard shortcut for this service.
Open up System Preferences → Keyboard → Keyboard Shortcuts. In the left panel
click on Services and then click on the + button under the right panel. In the
following dialog choose:
- Application : All Applications
- Menu Title : Pause iTunes for 5 minutes
- Keyboard Shortcut : F10
Following shortcut illustrates the result. Note that it is vital that the Menu
Title chosen is exactly the same as the name under which you have saved the
service.
[Update] New services will be added to the list automatically. The only
remaining thing is to add a shortcut key. This might be a feature of Lion or
Mountain Lion as I do not recall it while using 10.6.
All done, you can now enjoy launching your script anywhere, anytime by pressing
F10.
Any self-respected hipster photographer must provide his share of vintage
photos with helvetica captions. In order to make life easier for people using
the Greatest Image Manipulation Program™ I have made a script which does the
hard part. The provided script is based on this tutorial.
Download the script and put it into your ${HOME}/.gimp/scripts folder (or its
equivalent on your system).
Vintage Color script for GIMP
Some demos


Changelog
version 1.1
- put the whole script into an undo group
- replaced deprecated functions by newer ones - operating on items
version 1.0