Use QtCreator to develop OpenViBE in 2017 on Linux
7 minutes readNote: This tutorial does not use the meta repository. It uses the latest OpenViBE 2.0.0 repositories with the multi-repository build. It is based on QtCreator 4.4.1 (the currently latest stable release). It will work on the 4.5 version, however this one seems to not currently work very well on Linux.
It is possible to simplify this installation a LOT if you only wish to build the OpenViBE component and wish to use the default SDK (Kernel, Modules, base plugins..) and Designer. In that case only take the part concerning the extras repo and do not specify custom OPENVIBE_SDK_PATH and DESIGNER_SDK_PATH.
This tutorial also does not use the build scripts!
This post assumes that your final configuration will look like this:
- openvibe
- sdk git repository for OpenViBE SDK
- designer git repository for OpenViBE Designer
- extras git repository for OpenViBE Extras
- test git repository for integration tests
- build contains all of the build folders populated by CMake
- sdk-debug
- sdk-release
- designer-debug
- designer-release
- extras-debug
- extras-release
- dist contains all of the folders created during CMake INSTALL phase
- sdk-debug
- sdk-release
- designer-debug
- designer-release
- openvibe-debug this tis the final destination of the complete Debug build
- openvibe-release and the release build
In my examples I am putting all of these files under /opt, if you want them somewhere else you should change all instances of /opt in this tutorial to something else.
Clone the repositories
Get to the folder where you want to have your openvibe root folder and do:
cd /opt
mkdir openvibe
cd openvibe
mkdir build
cd build
mkdir sdk-debug sdk-release designer-debug designer-release openvibe-debug openvibe-release
cd ..
mkdir dist

git clone git@gitlab.inria.fr:openvibe/sdk.git sdk
git clone git@gitlab.inria.fr:openvibe/designer.git designer
git clone git@gitlab.inria.fr:openvibe/extras.git extras
git clone git@gitlab.inria.fr:openvibe/test.git test
Install dependencies
Some dependencies are needed, this will install all linux native packages + some extras such as test.
# if you want test data you will need the values for these variables
export PROXYPASS=""
export DEPENDENCY_SERVER=""
perl sdk/scripts/linux-install_dependencies.pl --manifest-dir sdk/scripts/ --dependencies-dir dependencies
perl sdk/scripts/linux-install_dependencies.pl --manifest-dir designer/scripts/ --dependencies-dir dependencies
perl sdk/scripts/linux-install_dependencies.pl --manifest-dir extras/scripts/ --dependencies-dir dependencies

cd /opt/openvibe/sdk
./unix-get-dependencies.sh --manifest tests-data.txt --out /opt/openvibe/dependencies --cache /opt/openvibe/dependencies/arch
Configure the QtCreator
This step will have to be reproduced for all of the other repositories with minor changes.
It is important to know how CMake actually works, a quick summary:
- CMake creates a build folder during configuration step. This folder contains all of the configuration files (CMakeCache.txt is the most important), ninja file (this tells the compiler in what order it should build the project) and the built binary files.
- When you configure the project all of the variables you specify at configure are saved in the build folder.
- When you build the project, the binary files are kept in the build folder.
- When you INSTALL the project, only the files that are necessary for the final application are copied into the dist folder (specified by CMAKE_INSTALL_PREFIX. On Linux, the default dist folder is
/usr/localand on Windows it isC:\Program Files (x86)\PROJECT_NAME. We do not want to use the default folders!
Session configuration
Launch QtCreator, create a new session
SDK configuration
Go to Welcome -> Open Project and navigate to the openvibe/sdk/CMakeLists.txt file, a dialog like this will open:
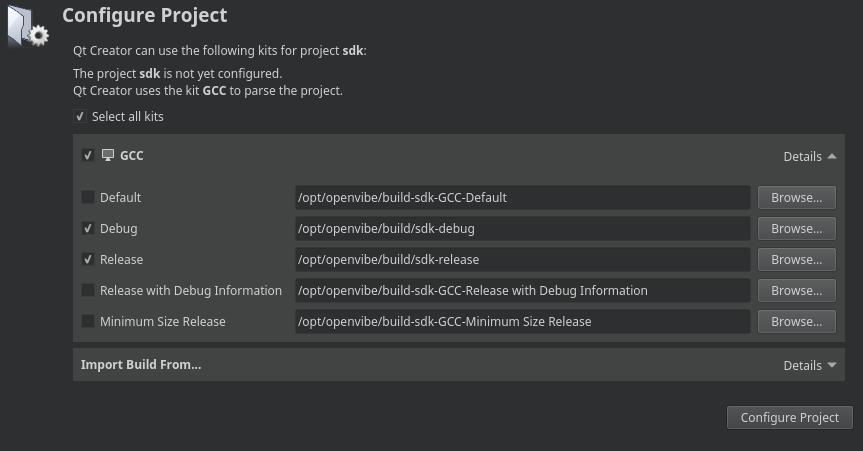
Note that I have already changed all paths to what they should be.
Click on the Configure Project button.
CMake variables
You will see a lot of errors printed in the General Messages tab on the bottom. Go to the Projects pane on the right and select build under GCC.
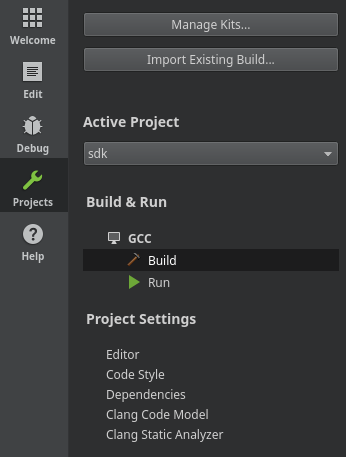
Check that the Edit build configuration dropdown is set to Debug on the top of this window.

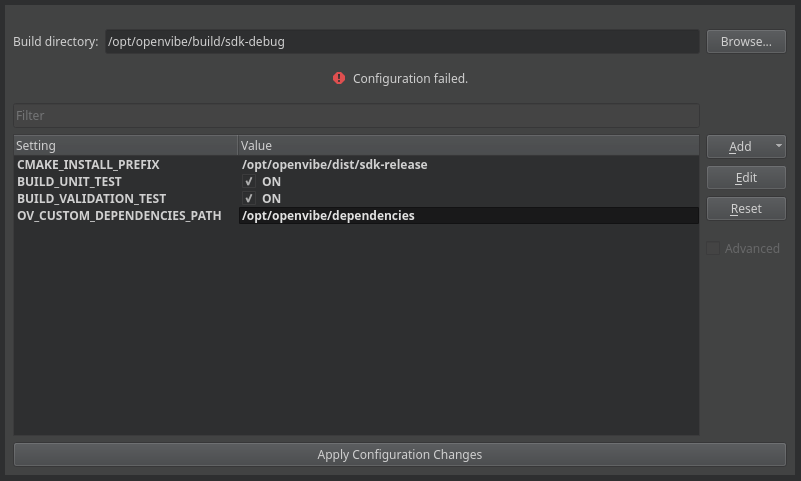
Now you will need to (sadly, blindly) add a few variables to the lot. This is because the configuration by default is not what we want.
Add these variables:
- CMAKE_INSTALL_PREFIX
String/opt/openvibe/dist/sdk-debug - OV_CUSTOM_DEPENDENCIES_PATH
String/opt/openvibe/dependencies - BUILD_UNIT_TEST
BooleanON - BUILD_VALIDATION_TEST
BooleanON
The test variables are not strictly necessary and you can turn them OFF if you want.
Click on Apply Configuration. Note that Qt Creator does not save this configuration if you do not use Apply!
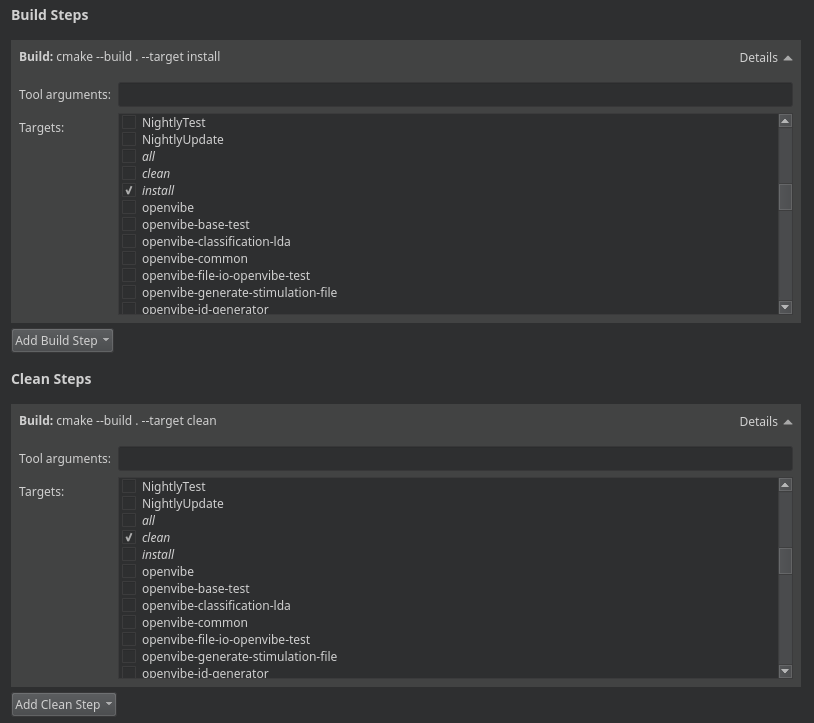
Install and clean
In order to actually run the INSTALL step after each build (this is not how normal projects work but here it is necessary).
In the Build Steps and Clean Steps choose the install and clean option respectively.
Run environment
OpenViBE requires some variables on runtime to work. Also, as we are not installing into a default prefix we need to tell Linux where to find the libraries.
In the Build Environment click on Batch Edit… and insert the following string:
LD_LIBRARY_PATH=/opt/openvibe/dist/sdk-debug/lib
OV_PATH_ROOT=/opt/openvibe/dist/sdk-debug
You are now ready to build OpenViBE SDK in Debug mode. Give it a spin, either right click on the OpenVIBE project in the Edit view or use the hammer button on the bottom left.
Release configuration
Redo the same thing for Release configuration on the top.
In this case you will need to change the CMAKE_INSTALL_PREFIX to /opt/openvibe/dist/sdk-release/. And choose the appropriate environment variables like so:
LD_LIBRARY_PATH=/opt/openvibe/dist/sdk-release/lib
OV_PATH_ROOT=/opt/openvibe/dist/sdk-release
Designer configuration
This step is very similar to the SDK. First open the project from the Welcome screen.
On the configure project page select:
- Debug build folder is
/opt/openvibe/build/designer-debug - Release build folder is
/opt/openvibe/build/designer-release
Do not forget to disable all other build types.
CMake variables
You will need some additional CMake variable specified:
- OPENVIBE_SDK_PATH
String/opt/openvibe/dist/sdk-debug - LIST_DEPENDENCIES_PATH
String/opt/openvibe/dependencies - CMAKE_INSTALL_PREFIX
String/opt/openvibe/dist/designer-debug
This tells the designer to find the SDK built in the previous step. Otherwise the designer will use SDK from its dependencies.
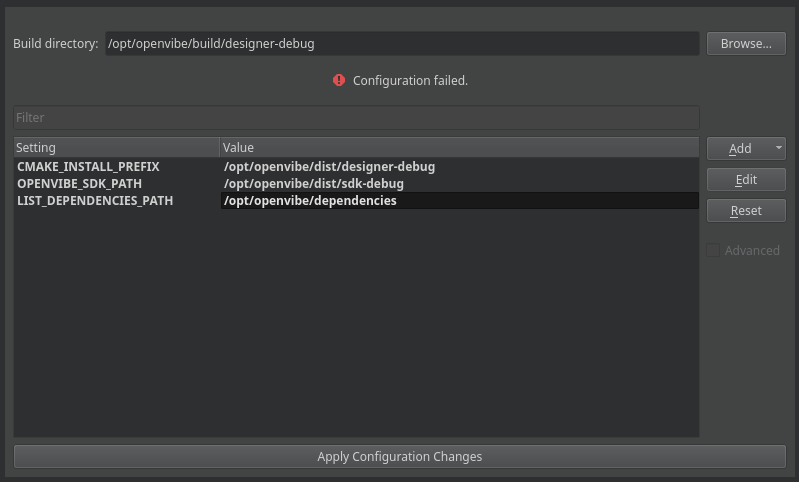
Click on Apply Configuration.
Install & Clean
Check the install and clean options in Clean and Build steps like in SDK.
Run environment
We also want to be able to run a “pure” designer installation from Qt Creator.
In the Build Environment click on Batch Edit… and insert the following string:
LD_LIBRARY_PATH=/opt/openvibe/dist/designer-debug/lib
OV_PATH_ROOT=/opt/openvibe/dist/designer-debug
You are now ready to build OpenViBE Designer in Debug mode. Give it a spin, either right click on the OpenVIBE project in the Edit view or use the hammer button on the bottom left.
Extras configuration
Once again (and for the last time).
On the configure project page select:
- Debug build folder is
/opt/openvibe/build/openvibe-debug - Release build folder is
/opt/openvibe/build/opevibe-release
Do not forget to disable all other build types.
CMake variables
You will need some additional CMake variable specified:
- OPENVIBE_SDK_PATH
String/opt/openvibe/dist/sdk-debug - DESIGNER_SDK_PATH
String/opt/openvibe/dist/designer-debug - LIST_DEPENDENCIES_PATH
String/opt/openvibe/dependencies - CMAKE_INSTALL_PREFIX
String/opt/openvibe/dist/openvibe-debug
This tells the designer to find the SDK built in the previous step. Otherwise the designer will use SDK from its dependencies.

Click on Apply Configuration.
Install & Clean
Check the install and clean options in Clean and Build steps like in SDK.
Run environment
Finally, we want to be able to run the complete installation.
In the Build Environment click on Batch Edit… and insert the following string:
LD_LIBRARY_PATH=/opt/openvibe/dist/openvibe-debug/lib
OV_PATH_ROOT=/opt/openvibe/dist/openvibe-debug
You are now ready to build the Full OpenViBE Designer in Debug mode. Give it a spin, either right click on the OpenVIBE project in the Edit view or use the hammer button on the bottom left.
You should now see all of the various OpenViBE projects in the build menu.
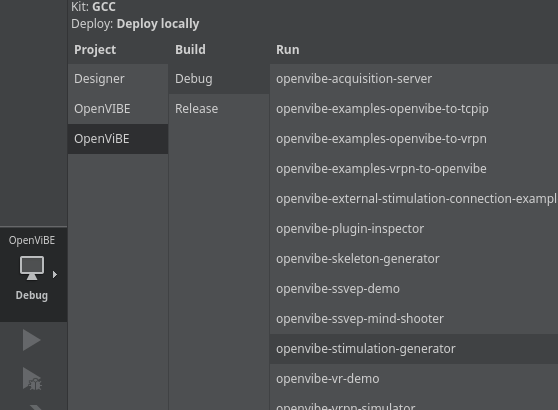
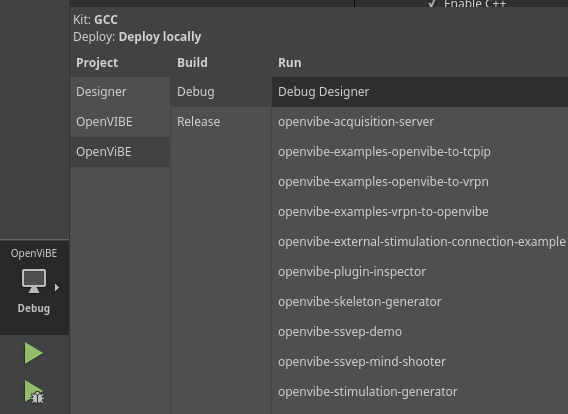
Running the OpenViBE Designer with the full feature set
The Designer project is built in a separate project from extras. If you want to run the designer (or debug it) with all of the plugins, you need to create a new run configuration.
Go to Projects -> OpenViBE -> Run in the left pane. Be careful to choose the OpenViBE Project which corresponds to extras!
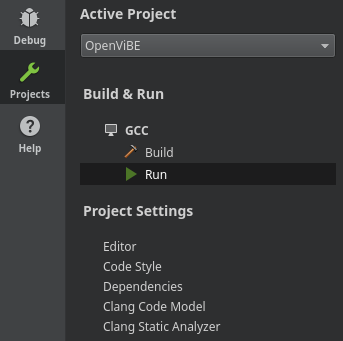
Click on Add -> Custom Executable

Now select the /opt/openvibe/dist/openvibe-debug/bin/openvibe-designer as Executable.
Rename this configuration as Debug Designer. You can now choose it from the projects menu and run it using the play button (or debug it using the play button with a little bug on it)