Lock screen on Mac OS X with keyboard shortcut [updated]

Last update: 2017-11-18 for High Sierra

Luckily we now have a real shortcut without hacks using ⌃⌘Q

One of the issues that rises the most eyebrows while using Mac OS X is that there is no native way of simply locking your screen with a keyboard shortcut. Finally I have managed to compile all of the stuff on the Internet to come up with a simple yet real solution to this problem If you can not be bothered by reading the whole article here is the short version:

  1. Run Keychain Access go to Preferences → General → Show keychain status in menubar.
  2. Look at this tutorial.
  3. Use the script from freespace’s github page instead of my example.

And now for the long version.

Introduction

There are a lot of ways to work around this problem and many of them were already published on a zillion of blogs. In practice four methods prevail:

  1. Setting the system to lock immediately upon launching the screensaver and then using the ctrl+⇧+⏏ (control+shift+eject) shortcut.
  2. Enabling the Keychain Access menu item and then choosing lock screen from the menu (by mouse).
  3. Enabling the multiple user login and then switching user.
  4. Using a third party software, such as Quicksilver or Alfred.

Of course these methods have all some benefits and some drawbacks. When we look at them we can easily spot that only the option two actually does what we want: it locks the screen without closing the session, it is native and it has to be invoked by the user. However it does not use the feedback, so fails to satisfy the primary objective.

The real solution

It is extremely simple to assign a keyboard shortcut to any item in the application menu. Sadly, the task bar is not considered part of it and the keyboard shortcuts will not reach it. Enter AppleScript and Automator, solution to any problem there is! It took some digging but there actually is an AppleScript which clicks on menu items. With that we can create a service that will then be available thorough a global shortcut.

Preliminary

In order for this to work you need to enable the Keychain Access menu item. Run Keychain Access go to Preferences → General → Show keychain status in menubar,

Implementation

The path from a script to a service to a keyboard shortcut is already paved. I have already covered how to assign a global keyboard shortcut to a script so please refer to that.

The script

The actual script to use is taken from freespace’s github page and is actually based on an example provided by Apple itself. For the sake of consistency, here is the script:

tell application "System Events"
    get properties
    get every process
    if UI elements enabled then
        tell process "SystemUIServer"
            repeat with i from 1 to number of menu bar items of menu bar 1
                if description of menu bar item i of menu bar 1 is "Keychain menu extra" then
                    tell menu bar item i of menu bar 1
                        click
                        if name of menu item 1 of front menu is "Lock Screen" then
                            click menu item "Lock Screen" of front menu
                            exit repeat
                        end if
                    end tell
                end if
            end repeat
        end tell
    else
        tell application "System Preferences"
            activate
            set current pane to pane "com.apple.preference.universalaccess"
            display dialog "UI element scripting is not enabled. Check \"Enable access for assistive devices\""
        end tell
    end if
end tell

And for the sake of clarity: I did not code this script.

Fried noodles with pork

More food from my production. Tested, eaten and tasty. This food does not require much ingredients and should be pretty quick to prepare (if you are good at multitasking then about 20 minutes)

Ingredients

As always, we will have to do some shopping before cooking anything. Depending on what you already have you can get this for about 6€ for two doses. So go and get these:

ingredients

  1. Some mushrooms
  2. Some shiitake mushrooms
  3. A piece of leek
  4. Half a carrot
  5. Half an onion
  6. Several slices of garlic
  7. Soy sauce
  8. Cornstarch
  9. Salt
  10. Black pepper
  11. Chinese noodles
  12. Pork (can be some other meat)

Preparation of ingredients

Before cooking comes washing and cutting

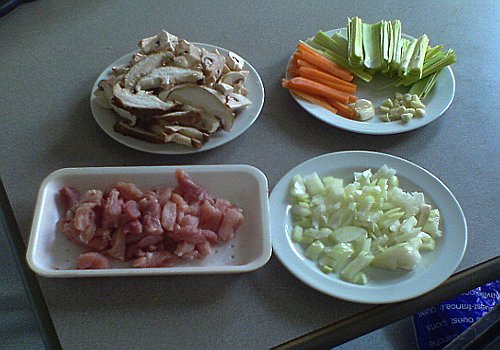
  • Wash the mushrooms and cut them into quarters or similar
  • Cut the shiitake mushrooms into slices (wash them too)
  • Cut the leek and carrots into long thin bars
  • Cut the onion into dices
  • Crush one piece of garlic and cut the rest into small pieces
  • Cut the meat into french-fries like pieces (salt it)
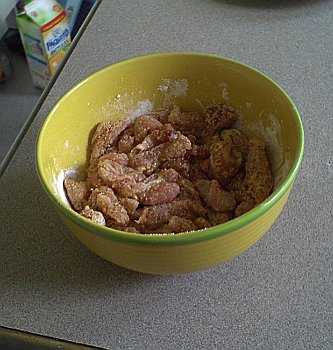
    • Dip the meat in soy sauce and wrap it in cornstarch

sliced-ingredients dipped-meat

Cooking

First stage

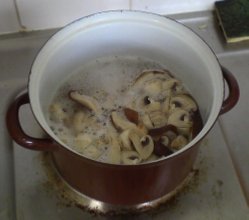
First we will cook the mushrooms. Put the crushed piece of garlic into salted water (not much just enough to have the mushrooms covered) and make it boil. Then add mushrooms (both) and cook for about three minutes.

cooking-mushrooms

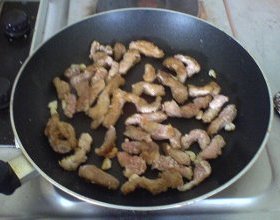
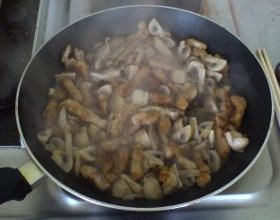
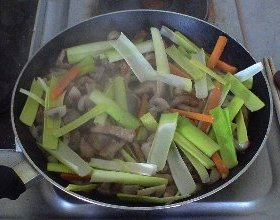
At the same time put some oil onto a frying pan, heat it and add sliced garlic. When it turns brownish add the meat and fry it for a while. Add pepper. When the crust from cornstarch appears add mushrooms and some water (use the mushroomy water). After a while add carrots and leek. Cook for several minutes stirring all the time. Add some more water from mushrooms from time to time. At the same time (this is when multitasking comes handy) make the noodles (for cooking method refer to the package)

Second stage

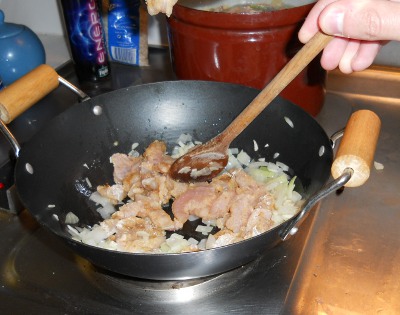
Put some oil into a wok and add onions. Put noodles into the wok add soy sauce and fry them for a while (mix them well). After a while add the meat and some more water. Cook for several minutes.

cooking-meat-1 cooking-meat-2 cooking-meat-3

Final stage

Eat.

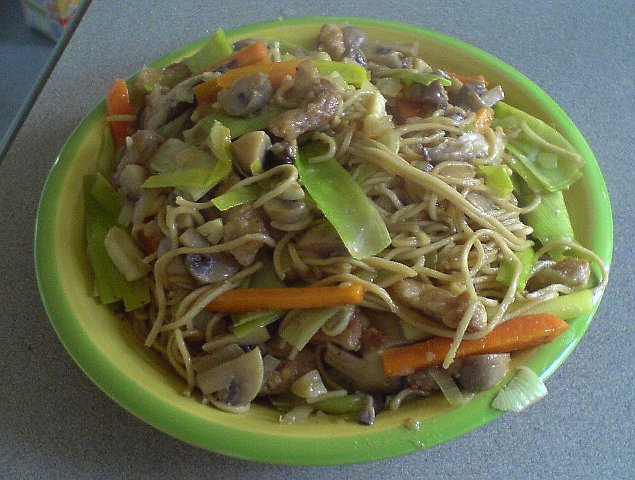
Suggestion of presentation:

final-product

Putting old stuff back in

I have decided to re-publish the old articles from my old Chyrp blog here. I have not got to it before as I was too lazy. Not that anybody cares but at least it will look like there is something here.

Smelly spread

Why smelly? Because your breath after eating this will be comparable to that of a thousand years old dragon. But it is well worth it. The recipe is dead simple as well.

Ingredients

ingredients

  1. Sardines in oil (any oil as long as it is not motor oil)
  2. Butter
  3. Onions

Preparation

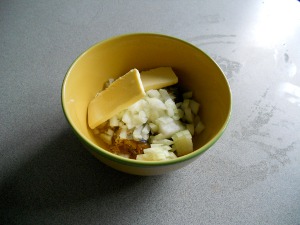
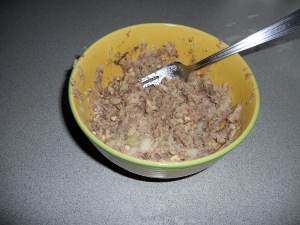
Simple as promised: Just put the fish into a bowl, add a few slices of butter and the diced onions. Then furiously mix the thing until it vaguely looks like something spreadable on a bread. Job’s done!

preparation-1 preparation-2

And yet …

Making the spread is simple, the difficult part is to serve it right and arrange the plate so it will have some bling to it. I did not try this time, but somedays I’ll update this with some better presentation.

finished

Shanghai Heat

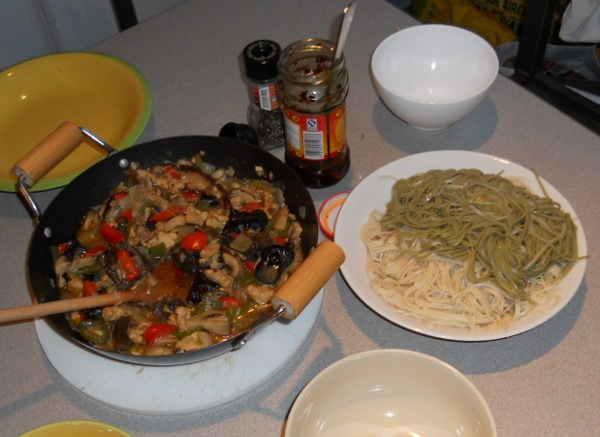
More noodles! Why ?, you might ask, well because everyone loves noodles. And mushrooms, we will be seeing lots of those in just a few moments. So, put on your white hat and start making a list of things to buy.

Ingredients

OK, be prepared to raid the nearest Asian shop because this meal needs several special ingredients. As always, here’s a picture of what we’ll need :

img-ingredients

  1. Chicken escalopes
  2. Mushrooms - Agaricus
  3. Shiitake mushrooms
  4. More shrooms - Pleurotus
  5. Auricularia auricula-judae or “black curly Chinese mushrooms” (I actually mix two kinds of them)
  6. Green and red bell pepper
  7. Chilly pepper, also both red and green
  8. Onions
  9. Garlic
  10. Butter (salted butter for the win)
  11. Corn starch
  12. Black pepper
  13. Spices - coriander, caraway, cumin, cinnamon, paprika …
  14. Salt
  15. Soy sauce
  16. Shanghai noodles
  17. Green-tea soba noodles

Preparation

Got everything? Good! Preparation of the ingredients is pretty simple and shouldn’t take more than twenty minutes.

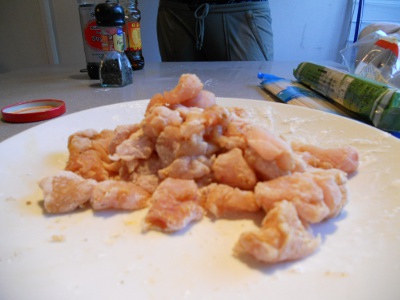
  • Clean the chicken and slice it to small pieces. Add the spice mix and cover it in a thin layer of corn starch. I usually just put a soup spoonful of it on it and mix it with hands.
  • Wash the mushrooms and slice them.
  • If the black mushrooms are too huge, crush them before washing them.
  • Wash, clean and cut the bell peppers into cubes.
  • Wash the chilly peppers and cut them into roundels.
  • Cut the onion into halves. Dice one of the halves and cut the other to several smaller parts.
  • Crush one piece of garlic and dice the rest.

img-meat

Cooking

Everything’s done ? Excellent, now we can start doing some cooking.

Shrooms

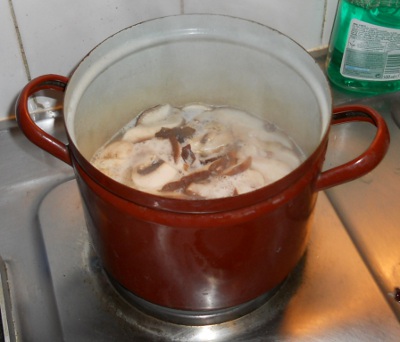
Pour some water into a bucket … err a cooking pot. Not too much of it though. Just enough that when you put all the mushrooms into it it will cover them all. Don’t put them in it just yet though. Put some butter and one crushed clove of garlic in there first, don’t forget to add salt. Let it boil and put all the mushrooms inside afterwards. Wait for about 2 minutes.

img-shrooms

Vegetables

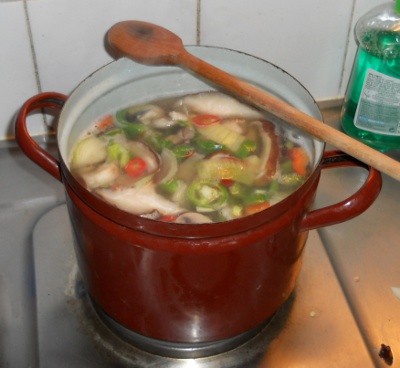
Once the mushrooms are half cooked pour more water into the pot and add all the vegetables - bell pepper, chilly and half of the onion (the one cut into bigger cubes). Add some black pepper as well. Cook until it’s cooked (duh).

img-vegetables

Meat

Once the vegetables are cooking, you can begin to prepare the meat. Put the diced garlic and onions onto a frying pan with a bit of oil. Make them fry for a while and then put the meat into the pan and add some soy sauce.

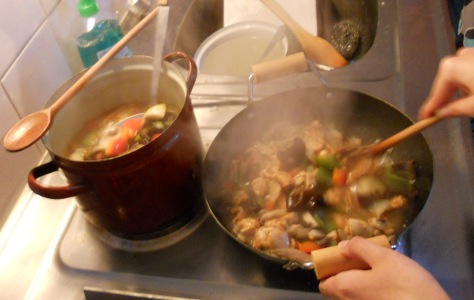
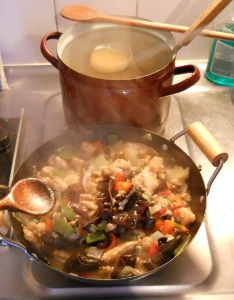
After a few minutes, when the meat is fried, add the contents of the cooking pot into the wok. Do keep at least a half of the water in the pot, we will use that later. Lower down the heat under the wok.

img-frying img-combining img-combining2

Noodles

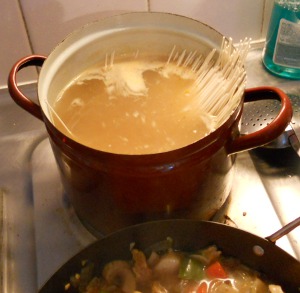
We will be using a mix of Shanghai noodles and green-tea flavoured noodles, but any noodles will go. Add more water to the cooking pot, let it boil again and cook the noodles inside (refer yourself to the package, cooking time may (and will) vary). Once the noodles are cooked, you are ready to serve.

img-noodles

Final word

Finally a meal that not only tastes, but also looks good. When making this one, don’t hesitate to experiment. Personally I like to add some baby-corn, bamboo and especially some chilly sauce

img-finished

Add shortcuts for emoji characters to finally put the ± key to use

I have finally managed to find a use for the ± key on the Apple keyboard. This keyI have finally managed to find a use for the ± key on the Apple keyboard. This key bugged me since I got the computer as I have never ever seen it in a text and just can not understand why it would be on a keyboard in the first place.

Since there is a native text-expansion feature in OS X (Settings → Language & Text → Text) it seems that this character could serve as a perfect “marker” for some exotic shortcuts. The color emoticons available in the OS X make a perfect candidate since inserting them into text is quite a hassle as one has to go through the Special Character menu.

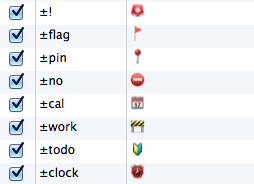
Thus I made shortcuts for some of them as illustrated here:

img-emoji-shortcuts

They help me navigate in plain text document and provide valuable highlighting options in places where other methods do not exist. Maybe this could help you too. Bugged me since I got the computer as I have never ever seen it in a text and just can not understand why it would be on a keyboard in the first place.

Vim setup

Again, this is mostly a social bookmark to have a trace of what different parts of my configuration files in my Vim folder do. Feel free to steal whatever part you like. Note that not all of these settings will work without additional plugins. The ones I use on daily basis are: Powerline, bclose, voom and latex-suite.

A hint: Since I am using several computers I use Dropbox to synchronize all of my vim configurations thus my .vim folder on every machine is just a symlink to the Dropbox folder. I have moved my vimrc file there as well and source it from the original .vimrc file in the home folder.

" In case we are in a 256 color capable terminal
set t_Co=256

" Set a right colorscheme colorscheme zenburn

" Let Powerline use nice symbols let g:Powerline_symbols = ‘fancy’

" Look for modelines embedded in source files, this is especially useful when " getting python code from other developers set modeline

" The only GUI element we want is the icon, remove menubar, toolbars etc. set go=i

" Always show the statusline set laststatus=2

" Display the beginning of the last line at the end of the buffer set display=lastline

" Turn on the syntax highlighting syntax on

" Set default window size to something sensible set lines=60 set columns=170 " " Set the editor to wrap long lines on words set wrap set linebreak

" Do not insert break lines to long lines set textwidth=0 set wrapmargin=0

" Turn on folding set foldenable

" Make folding indent sensitive set foldmethod=indent

" Don’t autofold anything (but I can still fold manually) set foldlevel=100

" don’t open folds when you search into them set foldopen-=search

" don’t open folds when you undo stuff set foldopen-=undo

" Start the filetype plugin, this is really necessary filetype plugin on

"set fuopt=maxvert

" I use simple php templates au BufNewFile,BufRead *.tmpl setf php

" Load doxygen syntax highlighting when necessary let g:load_doxygen_syntax=1

" Add doxygen syntax highlighting to all cpp files au BufNewFile,BufRead *.cpp setf cpp.doxygen

" Add jQuery syntax highlighting au BufRead,BufNewFile jquery.*.js set ft=javascript syntax=jquery

" Activate line numbers set number

" Tab size to 4 spaces, and no expanding of tabs to spaces! set tabstop=4 set shiftwidth=4 set noexpandtab

" Display only 5 first suggestions when correcting orthograph set spellsuggest=best,5

" I use the <,> shortcut to align a paragraph to the wrap width nmap , gqap " " Use Ctrl-W+ to close current file without closing the split (needs bclose &quot; plugin) nmap &lt;C-W&gt; <Plug>Kwbd

" Enable the use of Ctrl-Space and Ctrl-Enter for completion imap <C-S-space> <C-n> imap <C-space> <C-p> imap <C-CR> <C-x><C-o>

" Map the up/down arrow keys to follow visual lines, not the real ones map <Up> gk map <Down> gj imap <Down> <C-o>gj imap <Up> <C-o>gk

" Map Meta-j and Meta-k to follow visual lines map <M-j> gj map <M-k> gk

" Map Home and End to go to beginning and end of the visual line map <End> g<End> map <Home> g<Home> imap <End> <C-o>g<End> imap <Home> <C-o>g<Home>

" Make Meta-Shift-MouseScroll create a visual block selection noremap <M-S-LeftMouse> <4-LeftMouse> inoremap <M-S-LeftMouse> <4-LeftMouse> noremap <M-S-LeftDrag> <LeftDrag> inoremap <M-S-LeftDrag> <LeftDrag>

"set statusline=%<[%02n]\ %F%(\ %m%h%w%y%r%)\ %a%=\ %8l,%c%V/%L\ (%P) " Map gw to switch the word under the cursors with the next one nnoremap <silent> gw "_yiw:s/(%#\w+)(\W+)(\w+)/\3\2\1/<CR><c-o><c-l>

" Map gl to switch the word under the cursor with the previous one nnoremap <silent> gl "_yiw?\w+_W+%#<CR>:s/(%#\w+)(_W+)(\w+)/\3\2\1/<CR><c-o><c-l>

" Map F3 to show the list of buffers map <F3> :buffers<CR>:b<space>

" Map F4 to switch between .h and .cpp file map <F4> :e %:p:s,.h$,.X123X,:s,.cpp$,.h,:s,.X123X$,.cpp,<CR>g`"

" Map F5 and F6 to go to next/previous error marker map <F5> :cp<CR> map <F6> :cn<CR>

" Map F8 to save all files and run Make map <F8> :wall<CR>:make<CR>

" Start indenting scheme automatically filetype plugin indent on

" Use the right grep command on mac set grepprg=grep\ -nH\ $*

" Of course we are using latex let g:tex_flavor=‘latex’

" Autogenerate ctags on C/C++ source file save "au BufWritePost .c,.cpp,*.h silent! !ctags -R &amp;

" If we are on a Mac if has("unix") &amp;&amp; match(system("uname"),‘Darwin’) != -1 let g:platform_MAC=1 " Setup a nice font for powerline set guifont=Meslo\ LG\ M\ DZ\ for\ Powerline:h12

" Receive option keys as meta set macmeta

" Map :TB for mode for writing text on a big screen command TB colorscheme mayansmoke|set spell|set linespace=8|set guifont=Meslo\ LG\ M\ DZ\ for\ Powerline:h20|set fu " Map :TB for mode for writing text on a small screen command T colorscheme mayansmoke|set spell|set linespace=8|set guifont=Meslo\ LG\ M\ DZ\ for\ Powerline:h14 " Map :TB for mode for writing code command C colorscheme zenburn|set nospell|set linespace=0|set guifont=Meslo\ LG\ M\ DZ\ for\ Powerline:h12

" If we are on Linux else set guifont=Droid\ Sans\ Mono\ for\ Powerline\ 12 let g:Powerline_symbols = ‘fancy’

" Map Meta+V as paste from system clipboard imap <M-v> <Esc>"+pa imap <M-S-v> <Esc>"+Pa nmap <M-v> "+p nmap <M-S-v> "+P

" Map Meta+C as copy to system clipboard vmap <M-c> "+y

" Map Ctrl+S as save nmap <C-s> :w<CR> imap <C-s> <Esc>:w<CR>a

" Map :TB for mode for writing text command T colorscheme mayansmoke|set spell|set linespace=8|set guifont=Droid\ Sans\ Mono\ for\ Powerline\ 14 " Map :TB for mode for writing code command C colorscheme zenburn|set nospell|set linespace=0|set guifont=Droid\ Sans\ Mono\ for\ Powerline\ 10 endif

" Deletes double lines and such from a SVN log function! CleanSVNLog() %s/^-$//g %s/^r\d\d.$//g %s/\n\n\n/\r\r/ endfunction

US Extended layout for Mac with switched `/~ and §/± keys

The Mac keyboard layout is weird. Some choices Apple made when designing it are good but some of them really come from outer space. Why would anybody need a ± symbol on his keyboard is beyond me. Luckily Ukelele software provides an acceptable solution.

Personally I use U.S. Extended layout for almost everything. The only time I switch is when I have a very lengthy french text to write. (Speaking of which, why does french layout have a  character directly on the keyboard? Just how often would anybody use that?). So, in order to keep the layout consistent with other keyboards I have made a U.S. Extended+ version which changes flips the §± and `~ keys around.

Download it here:

USExtended+

How to make Uncle Ben's chili sauce not suck

1

When Leader Price discontinued my preferred chili sauce I was angry and very sad. Oddly enough, Intermarché did the same and removed chili from their selection of Claude Léger sauces. Obviously there is no market for chili in France. What is done is done and we, cheap chili lovers, are now stuck with the Uncle Ben’s crap.

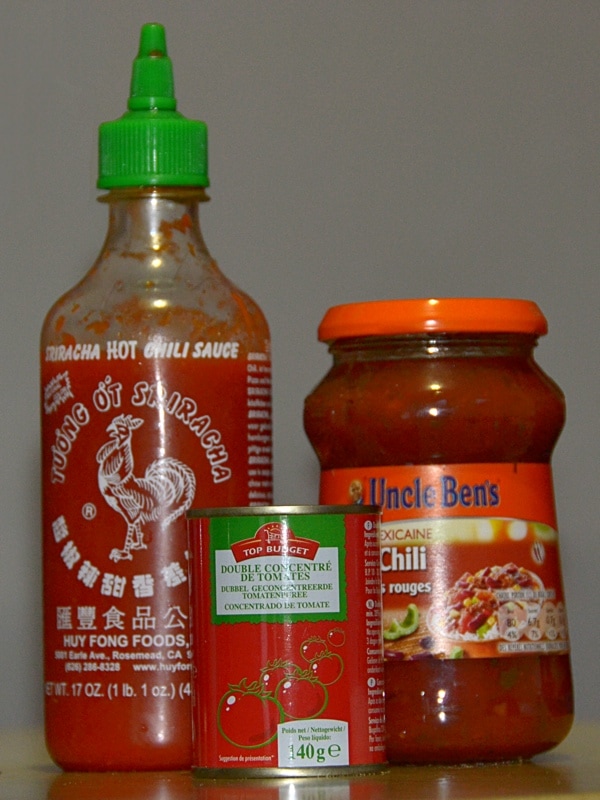
But let us not fall into despair, there is a way to save this non-perishable canned (bottled?) food franchise. The recipe is extremely simple, take a bottle of Uncle Ben’s chili sauce, add in a can of tomato paste and an appropriate amount of Sriracha sauce. And, voilà, ready to cook and serve. Preferably with bacon and rice.

List of useful links to hack your OS X installation

This is more of a social bookmark than a full article. OS X is pretty neat but the ever-present philosophy of “our way of doing it is the right way” can be frustrating from time to time. Since I do not really like the trend of paraphrasing already written articles I will just dump a bunch of links here and say what I used them for.

Fix Home and End keys behaviour

Home and End keys should go to the beginning and end of the line you are on while editing. In OS X they scroll to the top and the bottom of the current document, which is retarded.

A ton of useful hidden settings

I like keyboard repeat. Also I like to be able to copy text from QuickLook.

Use QuickLook from the terminal

I use this for my side-project of making Midnight Commander actually usable on OS X. So far I did not have time to really invest into it.