One of Markdowns design choices is to not implement any layout.
Problem
One thing I wish it had would be a way of specifying image positions. E.g.: float on right and have width equal to the third of the column. Just like the example illustration somewhere next to this text.
Markdown does support plain html tags, so a verbatim <img> tag would be a solution. I find this inelegant, however. Various markdown processors support their own way to add classes, or have their own layout engine. As I prefer to keep my markdown as close to the GitHub style as possible, this is not an option for me.
Solution
I have already explored the use of the $= selector for the src attribute in my previous article.
Now let us take this approach a bit further. We declare the CSS like this:
With the confinement I am realising that I have fewer hobbies than I thought. Also it turns out I don’t like watching TV shows as much.
I have started preparing several articles on this blog in advance, hopefully I’ll be able to keep a more steady writing cadence. At least until the ordeal lasts.
Episode 39 of the Dos Games Club podcast is out, join Martijn, Florian, Tim, Elias and me to discuss Worms, the legendary game that started the franchise with over 20 sequels.
In this episode we also assist live to the final match of our club tournament between Florian and Tim.
Today, my friends at DOS Game Club released a new episode of the podcast. I was one of the guests and together with Martijn, Tyler and Matthew we sat for a long chat about an old-time classic: UFO: Enemy Unknown, published by Microprose. In North America this game is known as X-Com: UFO Defense.
This game started a long series of games in all genres and is one of the longest going series.
This year’s Apple WWDC keynote will be allegedly focused on “Marzipan” and new iPad functionalities of iOS 13. Here are a few predictions that do not concern any of these.
Apple will tease the new Mac Pro and it will contain at least one user accessible ARM CPU. This will be usable for tasks like machine learning and iOS development.
Apple will not introduce a new MacBook Pro format. Otherwise they would Osbourne the latest crop of 15” MBPs.
HomePod will get multiple user functionality through voice recognition. Siri can already train on various voices and it seems to be working okay.
iOS 13 will be compatible with A9 and upwards. It might be even A10 but I doubt it. If it is A10, I would expect a feature that requires big.LITTLE CPU, like fewer restrictions for backgrounded apps.
As a side note, I hope Apple will not make the iTunes successor too simple. I wish it would retain support for iTunes Store, iTunes Match and local music, all of which are of great importance.
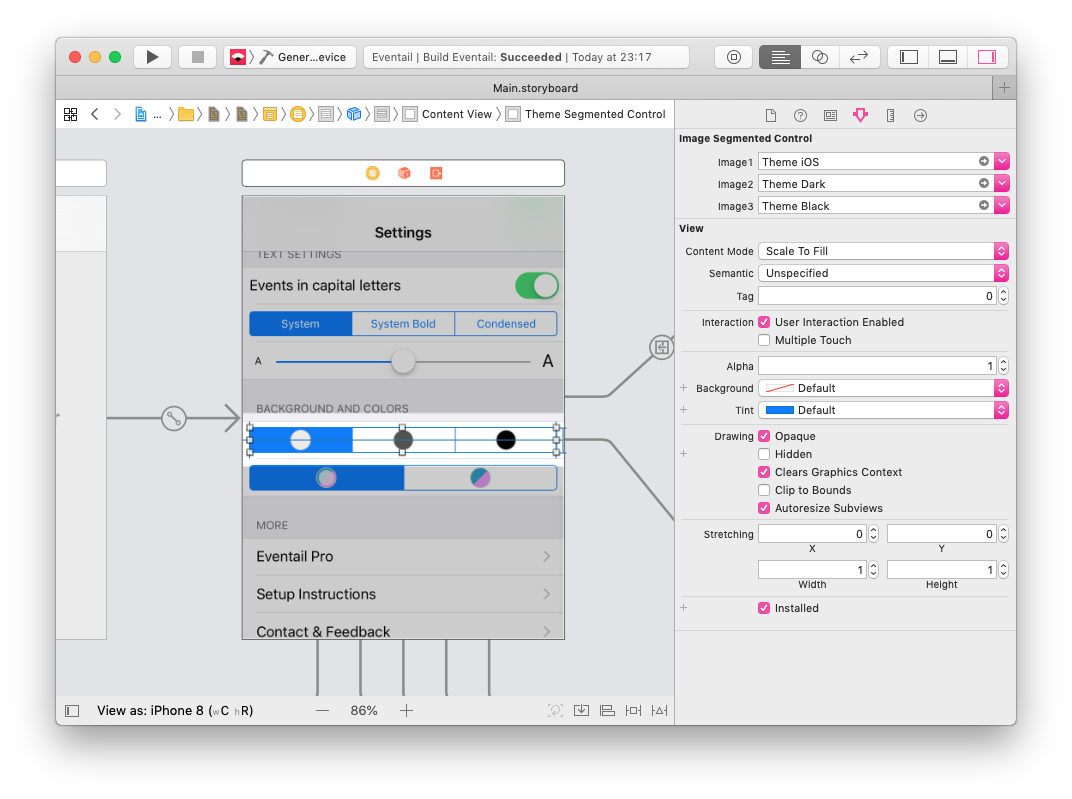
The default UISegmentedControl does not support color images. As I wanted to have some in Eventail, I have developed a quick replacement for the default view. It tries to copy the API as closely as possible.
I use some helper function from my “utility” library:
extensionCollection{/// Return an element of a collection or nilsubscript(optionali:Index)->Iterator.Element?{returnself.indices.contains(i)?self[i]:nil}/// Iterate over collection elements, progressively yielding the previous, current and next elementfuncrollOver(closure:(Self.Element?,Self.Element,Self.Element?)->Void){varprev:Self.Element?=nilforiinself.indices{letnext=self[optional:self.index(after:i)]closure(prev,self[i],next)prev=self[i]}}}
The class itself is simple and is @IBDesignable. Unfortunately, Xcode does not (yet) support @IBInspectable arrays so I expose three UIImage variables. If you need to add segments, copy and paste a few of those.
// ImageSegmentedControl.swiftimportFoundationimportUIKit@IBDesignableclassImageSegmentedControl:UIControl{// @IBInspectable does not support arrays yet, but a segmented control does// not really need to have too many elements@IBInspectablevarimage1:UIImage?=nil{didSet{images[0]=image1}}@IBInspectablevarimage2:UIImage?=nil{didSet{images[1]=image2}}@IBInspectablevarimage3:UIImage?=nil{didSet{images[2]=image3}}/// Currently selegted segmentpublicvarselectedSegmentIndex:Int=0// A nil image will represent a non-existing segmentprivatevarimages=[UIImage?](repeating:nil,count:3)privatevarsegments=[UIView]()privatevarisSegmentEnabled=[Bool](repeating:true,count:3)privatevarborders=[CALayer]()privatevarinitialized:Bool=falseoverrideinit(frame:CGRect){super.init(frame:frame)}requiredinit?(coderaDecoder:NSCoder){super.init(coder:aDecoder)}overridefunclayoutSubviews(){if!initialized{layer.cornerRadius=5layer.borderWidth=1layer.borderColor=tintColor.cgColorclipsToBounds=trueimages.forEach{guardletimage=$0else{return}letimageView=UIImageView(image:image)imageView.contentMode=.centerimageView.translatesAutoresizingMaskIntoConstraints=falsesegments.append(imageView)}segments.rollOver{prev,segment,_inaddSubview(segment)letpreviousAnchor=prev?.trailingAnchor??leadingAnchorNSLayoutConstraint.activate([segment.leadingAnchor.constraint(equalTo:previousAnchor),segment.centerYAnchor.constraint(equalTo:centerYAnchor),segment.heightAnchor.constraint(equalTo:heightAnchor),segment.widthAnchor.constraint(equalTo:widthAnchor,multiplier:1/CGFloat(segments.count)),])ifprev!=nil{borders.append(segment.addLeftBorderWithColor(color:tintColor,width:1))}segment.isUserInteractionEnabled=truelettapRecognizer=UITapGestureRecognizer(target:self,action:#selector(ImageSegmentedControl.handleTap(_:)))tapRecognizer.numberOfTapsRequired=1tapRecognizer.isEnabled=truesegment.addGestureRecognizer(tapRecognizer)}initialized=true}borders.forEach{$0.frame=CGRect(origin:$0.frame.origin,size:CGSize(width:$0.frame.width,height:frame.height))}foriin0..<segments.count{segments[i].backgroundColor=i==selectedSegmentIndex?tintColor:nilsegments[i].isUserInteractionEnabled=isSegmentEnabled[i]segments[i].alpha=isSegmentEnabled[i]?1:0.25}super.layoutSubviews()}@objcfunchandleTap(_recognizer:UITapGestureRecognizer){ifleti=segments.firstIndex(where:{$0==recognizer.view}){selectedSegmentIndex=isetNeedsLayout()UIView.animate(withDuration:0.3){self.layoutIfNeeded()}sendActions(for:.valueChanged)}}funcsetEnabled(_enabled:Bool,forSegmentAtsegmentIndex:Int){// We need to store the enabled/disabled state because the segments// can be actually initialized after this method is calledisSegmentEnabled[segmentIndex]=enabledifletsegment=segments[optional:segmentIndex]{segment.isUserInteractionEnabled=enabledsegment.alpha=enabled?1:0.25}}}
Some features of this view:
Exposes the currently selected segment via selectedSegmentIndex akin to UISegmentedControl
Inherits from UIControl so it has all of the outlets for common events. Only the valueChanged event fires though.
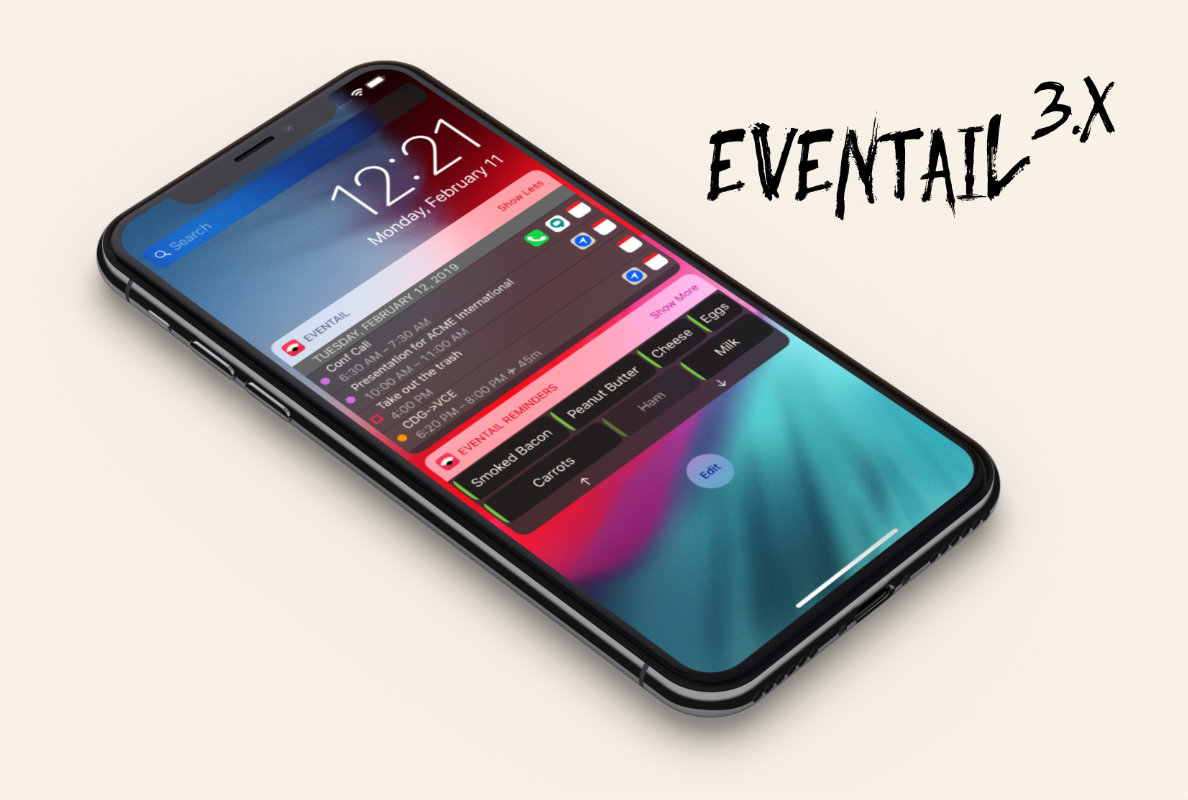
I have released a few versions of Eventail since my last post.
Version 3.0
The notable major update 3.0 has brought the interactive mode. When active, the widget will give each entry more space in the day view and populate each entry with buttons which can launch various actions.
The actions can open the events or reminders in an app of the user’s choice, start navigation to a specific event, join a conference call and more. The full list is described in the documentation.
This new mode is malleable and makes it easy for me to add integrations with other applications in the future.
Version 3.1
The 3.1 update for Eventail has brought support for, what I call, “universal URLs”. What this feature does is that any event or reminder that has the URL property set, will have a button in the widget to open it.
First usage that pops to mind is adding URLs to events manually, and there are some great candidates for that. For example you can use the iOS shortcuts URL scheme to launch a shortcut.
Another handy feature of iOS is that it will add a callback URL here every time you create an event from a message, be it an e-mail or iMessage. Since the message itself can contain useful information (such as a door access code for your hotel or flight reservation number) the ability to show it immediately from the lock screen is very practical.
Version 3.1.1
In version 3.1.1 I have added a possibility to define custom URLs for opening events and reminders. This way, I will not have to manually enter all possible URLs. A simple template will do. I will try to scour the Internet and add as many URLs for popular apps into the documentation.
Sneak peek into the future
Next release will bring a possibility to display the reminders with due dates inside the Todo widget instead of the Calendar view. Possibly there will be some new integrations as well.
Your application is finished and uploaded to the App Store. You are happy and eager to see the reactions from customers. Then, a review like this lands in:
Spanish,please★★★☆☆
by disappointed person – Feb 16, 2019
Cuándo será en español, la compraré....
After a few dozens of such reviews, you may be tempted to translate the application into another language. In this article I will point out a few reasons why that might be a bad idea and give a few pointers for when you decide to pass the hurdle.
Translation may bring other people into the churn
Working alone on an app makes a things easy and agile—writing new features and fixing bugs takes little time and once they are written nothing stops you from releasing the new version.
If you translate the application into a language that you do not master yourself, you need to bring in translators and to depend on them. This ties to someone else’s schedule every time you modify a visible text in the application.
Someone else might be on vacation, they might be sick or have other stuff to do and will not scramble to translate things for you. You have to plan the releases around their availabilities.
Translation brings additional (boring) work
I assume that you have thought about internationalisation from the beginning and that your code uses localisable strings everywhere. If it does not, this should be done before any translating can start.
You will have to translate all of the strings in the application and the whole UI. Be aware than many terms that are common in English are do not always have counterparts in other languages. This concerns a lot of technical and computer related vocabulary. This means that you will need to do due diligence to find out what terms are colloquially used in the target language for what you wish to describe.
Some languages handle the context differently from others: A menu with a lot of switches may only require a short label in front of each switch in English, but demand longer descriptions when translated. This may require alterations to the UI because the labels might no longer fit in the original space.
Once your application has been translated, you are halfway done. You also have to think about screenshots, documentation, marketing material1 and the website.
Translation is a commitment
Features which modify visible text will generate more work from now on. Screenshots, for example, are required for each supported language. Depending on your platform, their generation can be automated by tools such as fastlane2.
Be prepared to find yourself in a situation when you have finished the features, fixed the bugs, and are ready to submit, only to realise that you have forgot to translate the one button which you have added. If you are using translators, pray that they are not on vacation.
Expect to receive support mail in foreign languages. If you have used an external translator, you may not be able to answer them.
A few hints for future polyglots
If you have considered the above and are ready to start translating I can give you a few hints:
Minimise text in your application
Put as few labels as possible into your applications. Consider them like you consider code, if it exists it must be maintained.
I have removed some settings from my app at the last minute, so I would not have to translate the associated controls. If a feature is hard to explain in a foreign language, it might be too complex to use as well.
If a label can be replaced by a pictogram do so. A good example would be to use a slider with small and large character at either side rather than listing text sizes.3
Use textual representation for your translated strings
In iOS, you can use full Storyboards or string lists for translating the UI. Stick with the plain text lists as they are easy to diff and mistakes in them are quick to spot.
Localisation will live next to the code in your SCM repository and it is important that its format be adapted.
Make the non-translated strings pop
Use a gibberish placeholder for untranslated strings and add them immediately after you create each new string. Most frameworks will use the default (usually English) label for non translated strings and this can lead to forgotten translations.
Closing words
Translating an application might seem to be a good way to increase the number of possible clients and profit. But consider what you are giving up: having an application developed by a single person in a single language gives you incredible flexibility. This agility might be worth more than a satisfying few angry customers.